Everyone wants their private information to stay private, right? You too want your sensitive information safe from malware and people who would use that to learn things about you (you don’t want them to). BitLocker is designed to keep you protected, it keeps people who might snatch your computer from being able to use what they’ve taken. Because it saves you from what could turn into a dangerous security breach.
BitLocker was first introduced in Windows Vista. With it Windows can encrypt entire operating system drives and removable devices. When TrueCrypt controversially closed up shop, they recommended their users transition away from TrueCrypt to BitLocker.
What is BitLocker & and its Importance
In short, BitLocker encryption is Microsoft’s attempt to keep your data safe. When you encrypt your hard drive with BitLocker, everything on your drive becomes unreadable to anyone that doesn’t have your encryption key. On using your encryption key the hard drive inside the PC is decrypted and you can use your PC as you normally would. BitLocker lets users setup a flash drive with the information the PC needs for decrypting.
Microsoft have some software requirements you have to meet. The feature has been available since Windows Vista, but it’s only included in copies of Windows meant for businesses and enterprises. BitLocker Drive Encryption and BitLocker To Go require a Professional or Enterprise edition of Windows 8, or 8.1 or 10, or the Ultimate version of Windows 7. However, the “core” version of Windows 8.1 includes a “Device Encryption” feature that works similarly.
BitLocker Drive Encryption

This is a “full-disk encryption” feature that will encrypt an entire drive. When the computer boots, the Windows boot loader loads from the System Reserved partition, and the boot loader will prompt you for your unlock method for example, a password. BitLocker will then decrypt the drive and load Windows.
BitLocker To Go
For external drives, such as USB flash drives and external hard drives, can be encrypted with BitLocker To Go. You’ll be prompted for your unlock method for example, a password when you connect the drive to your computer.
The firmware or BIOS on the PC that you’re activating BitLocker on needs to support USB mass storage. This is because without a TPM chip, you’ll need to provide a flash drive with the information needed to decrypt your drive. You’ll want a Windows PC that has a TPM 1.2 chip at least for best experience.
This chip interacts with BitLocker on your behalf so that you don’t have to always provide the flash drive or a password. Your computer will let you know if you meet all the requirements. It checks for a TPM chip and the right partitions on your computer’s hard drive when you start setup.
You’ll also need a spare USB drive for recovery key during start up. It’s up to you whether you want the key stored on your Microsoft Account or a flash drive in case something goes wrong. You can also write the encryption key down on a sheet of paper for safe keeping.
Enable BitLocker For a Drive
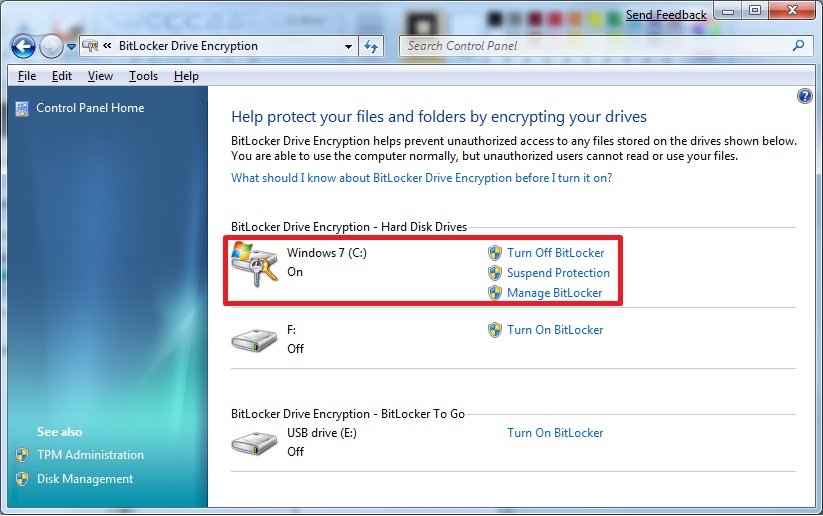
To turn on BitLocker encryption, go to the Control Panel and look for the BitLocker Drive Encryption panel. If you have Category View turned on, look for it under System and Security. You can also open Windows Explorer or File Explorer, right-click a drive, and select Turn On BitLocker. Click the Turn on BitLocker option next to an operating system drive, internal drive (“fixed data drive”), or removable drive to enable BitLocker for the drive.
You see a lock icon on devices encrypted with BitLocker. Like all encryption, BitLocker does add some overhead. Microsoft’s official BitLocker FAQ says that “Generally it imposes a single-digit percentage performance overhead.” If encryption is important to you because you have sensitive data — for example, a laptop full of business documents — it’s worth the performance trade-off.
Don’t forget to Subscribe and Share.